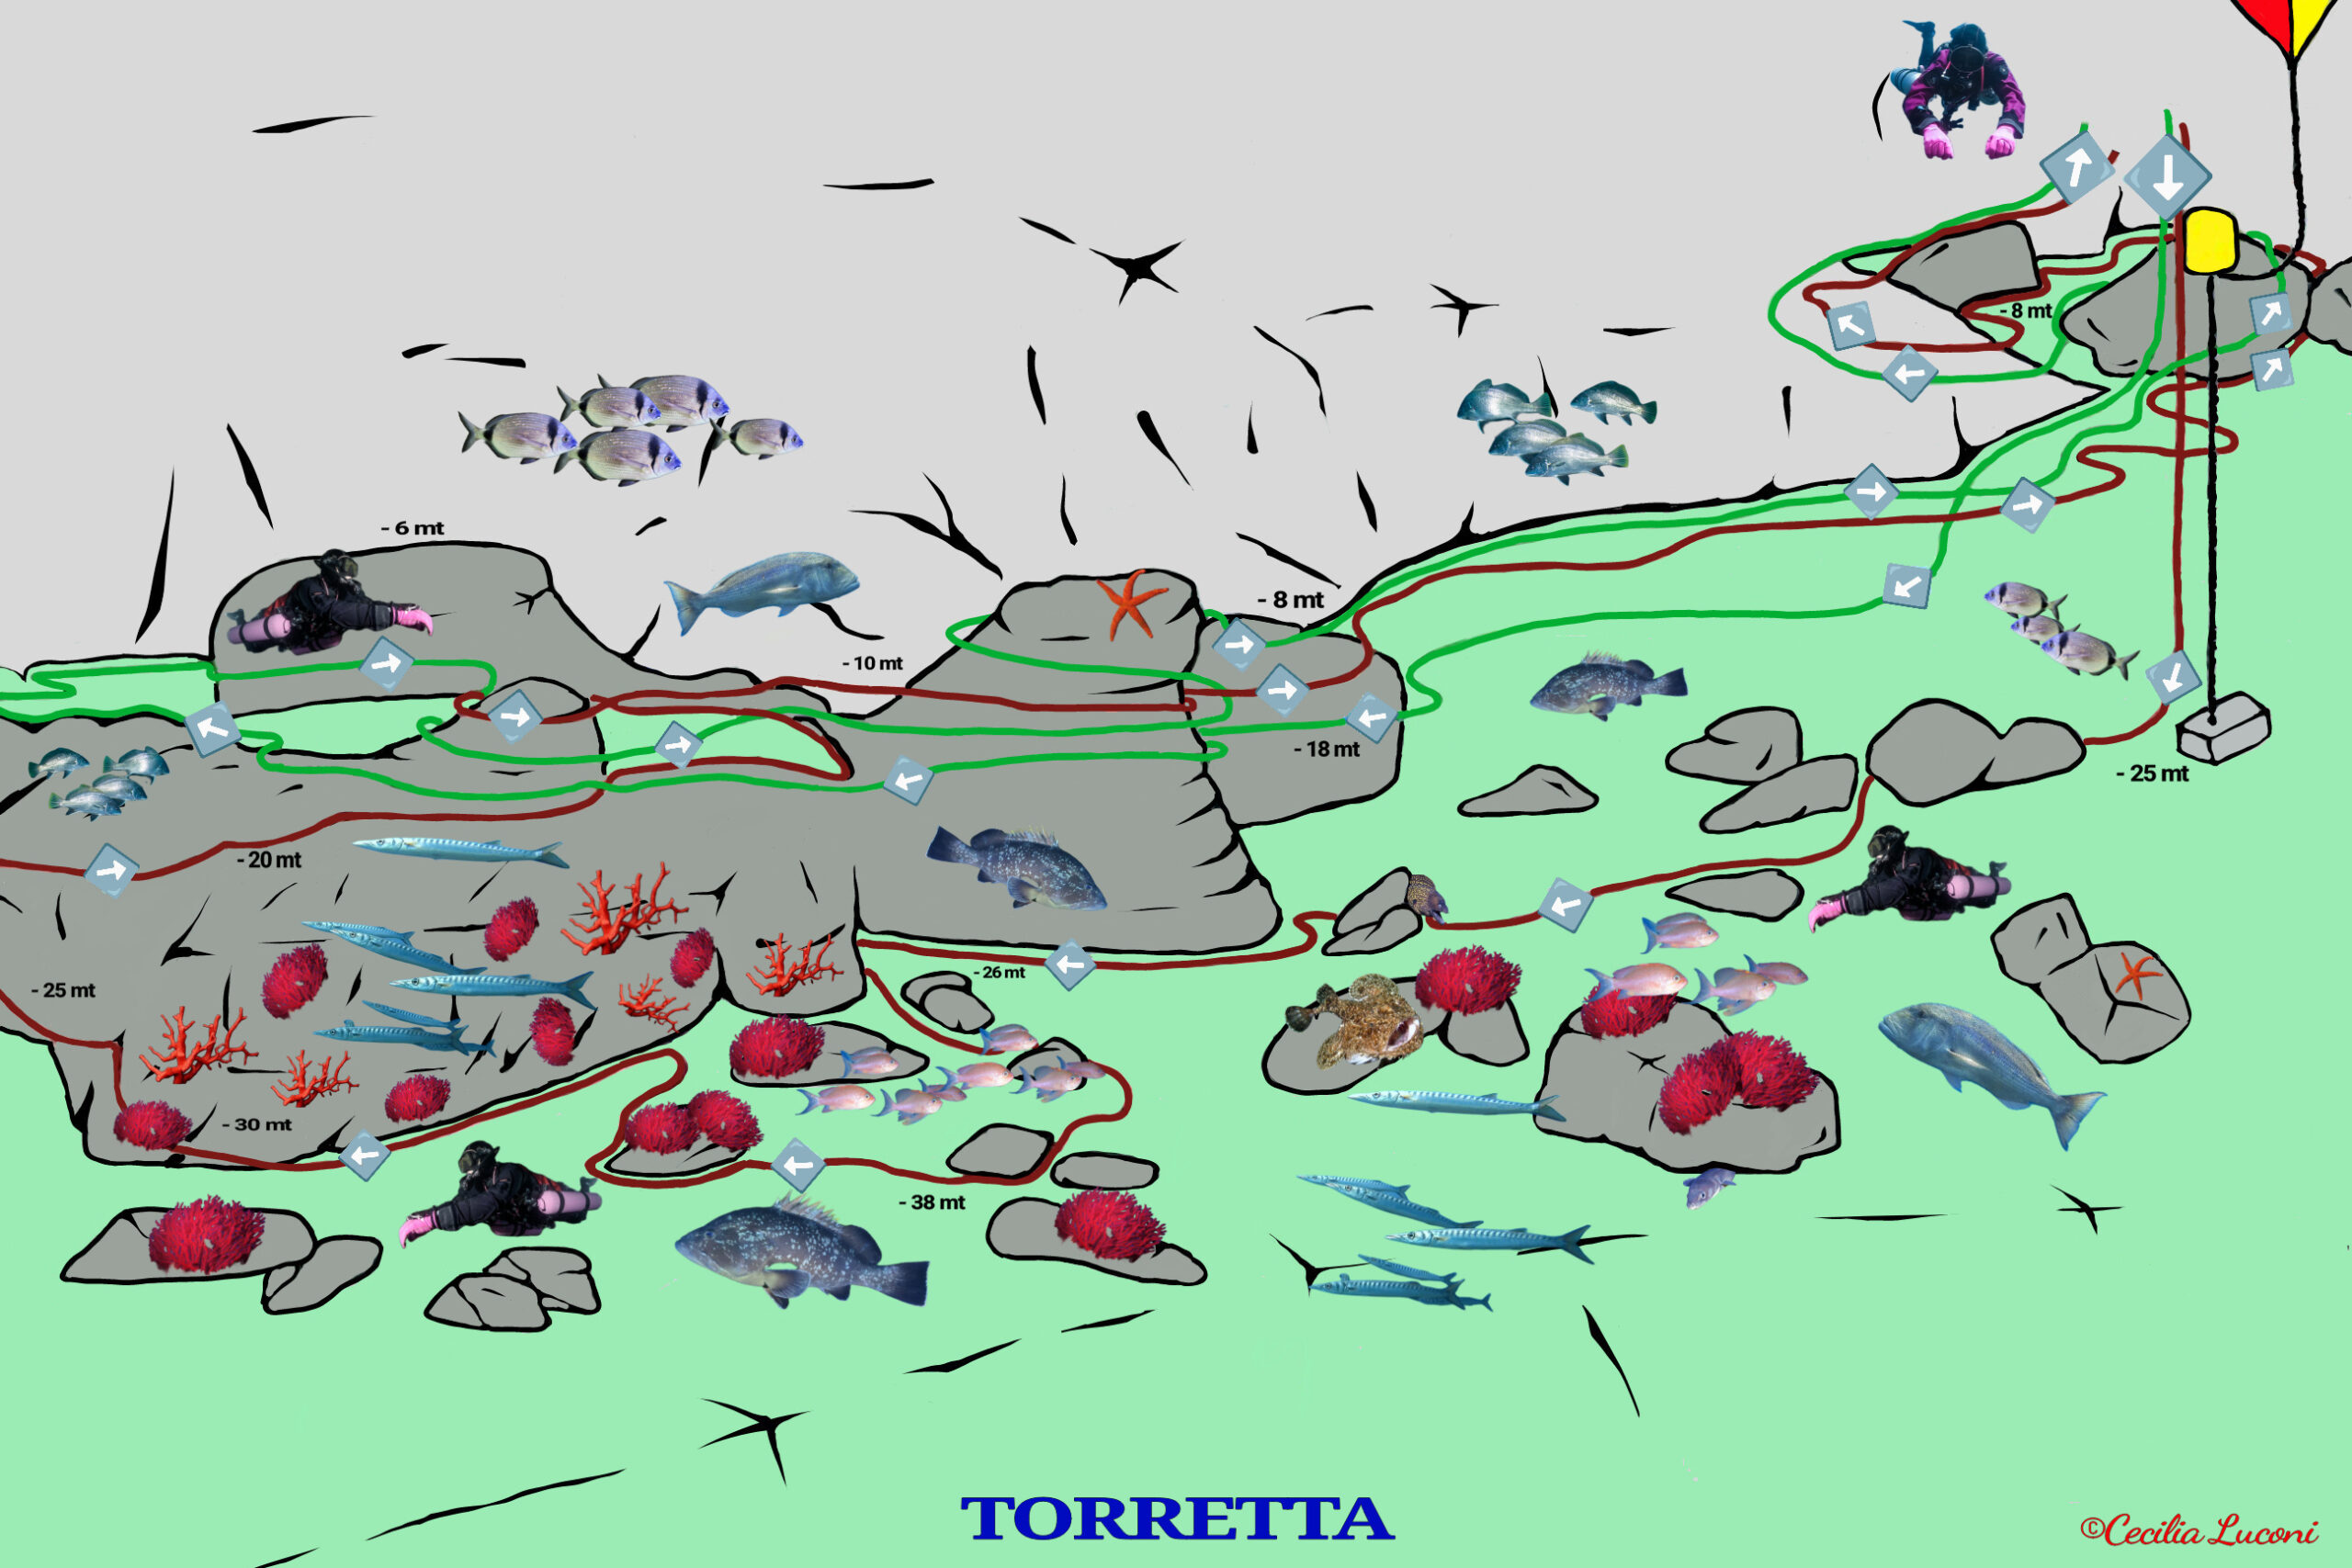
Torretta Peak
Dive Beneath the Tower: A Colourful Wall Alive with Life
This captivating dive site takes its name from the old stone tower perched high on the promontory above, visible from the water as it stands watch over the sea. Beneath its gaze lies one of the most vibrant underwater landscapes in the area—a dramatic wall adorned with red coral, elegant gorgonians, and rich marine life.
The dive begins heading south along this colourful drop-off, where lobster antennae peek out from rocky crevices and boulders at -40 metres are draped in magnificent gorgonian fans. Moray eels, conger eels, and small-spotted catsharks are commonly seen sheltering at the base of the wall, while barracuda patrol the midwater and brown groupers move calmly through the rocks. Out in the blue, speedy dentex flash past, always on the hunt—adding a thrilling energy to the dive.
The area is best explored in calm conditions, especially when southwesterly winds limit access to more exposed locations further along the Portofino coastline.
🔴 RED ROUTE (down to -40 m)
-
After our pre-dive check, we’ll descend along the mooring buoy.
-
Once at the anchor block at -25 m, we’ll head south-east to reach the start of the wall, keeping it on our right-hand side.
-
Coral and gorgonians appear early here, already visible at -18 m.
-
After carefully exploring the crevices and cracks, we’ll leave the wall to visit some offshore rocks at -40 m, where we may find conger eels, moray eels, or catsharks hiding beneath the overhangs.
-
We’ll then return to the wall, which eventually gives way to a rocky slope filled with life.
-
At around -20 m on our right, we’ll see a bay open up, where a large boulder covered inside with bright yellow Leptopsammia pruvoti (yellow cup coral) dominates the scene.
-
With the promontory now on our left, we’ll continue to around -10 m, reaching the upper section of the wall, which extends out toward open sea—an ideal spot to watch brown groupers and hunting dentex.
-
We’ll keep finning with the promontory still on our left until we spot a protruding boulder at -8 m. This marks the direction to the mooring buoy, heading east.
-
Before returning to the boat, we’ll make our safety stop in a small bay just ahead, where a massive central boulder offers shelter and a scenic resting point.
-
If visibility isn’t optimal, finding the chain may be challenging due to its distance from the wall—so we’ll exit safely alongside it.
🟢 GREEN ROUTE (down to -18 m)
-
After the pre-dive check, and if visibility allows, we’ll descend along the chain.
-
At -18 m, we’ll reach the top of the wall, already able to spot the first gorgonians stretching out toward the open sea—look down for even more life.
-
Continuing with the wall on our right, at -10 m we’ll encounter a massive boulder entirely coated with bright yellow Leptopsammia pruvoti (yellow cup coral).
-
With the promontory on our left, we’ll reach the top of the outward-facing wall at around -10 m—a fantastic place to observe brown groupers and fast-moving dentex in search of prey.
-
Keeping the promontory on our left, we’ll continue until we spot a prominent boulder at -8 m that signals the direction back to the mooring buoy, heading east.
-
Before returning to the boat, we’ll stop in a small bay just ahead to perform our 3-minute safety stop, right next to a gigantic central boulder.
-
If visibility is limited, locating the chain may be tricky due to its moderate distance from the wall, so we’ll exit safely alongside it.
Dive the Tower Wall with Diving Group Portofino
- Location: Near the promontory overlooking San Fruttuoso Bay
- Access: Boat dive
- Best conditions: Calm sea, good visibility
- Depth: 18 m (Green Route) | 40 m (Red Route)
- Difficulty: From beginner to advanced
Ready to dive beneath a historic tower and explore a spectacular wall teeming with red coral, gorgonians, and exciting marine life? Book your dive at the Tower Wall with Diving Group Portofino today!


